The time has come to start the front wall water damage repair on Project Camper no. 2 and brake maintenance. A family member wants to use the camper the end of July so this created an accelerated “fix it” plan, at least for the front wall.
The back wall, roof and all the other larger repair work will come as a winter project. I will add detail to this to help others learn and what to look for in their own camper. This is a fun project camper for me and I am glad I found it. The inside is in good shape from prior owners taking care of it. Just they may not have known about some of the causes of water damage and how to prevent it.
I will do this mainly in pictures to help cut down on the typing. The front wall area has 5 areas of water intrusion.
I will try to group the pictures to follow the areas of damage where it fits. I knew when I bought the camper the front wall was wet and that was not a problem for me. Since I knew I had to take the siding off, all the rest of the areas came along for the ride. At this point I have all the rotted wood out and ready to start repair process.
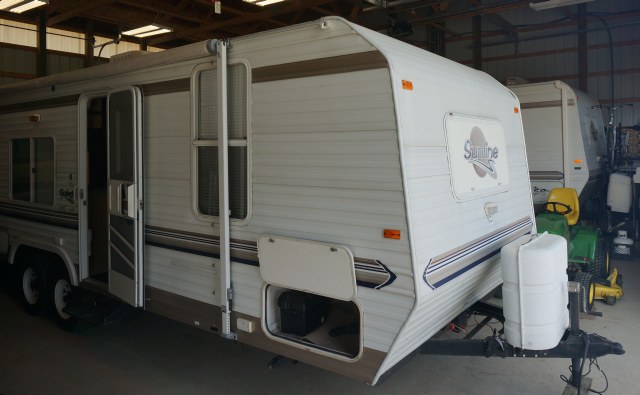
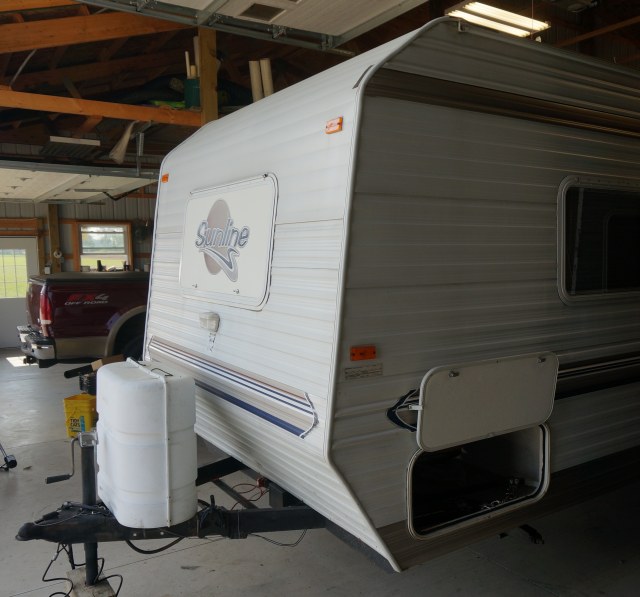
Here is the front wall area of the camper before disassembly.
![]()
![]()
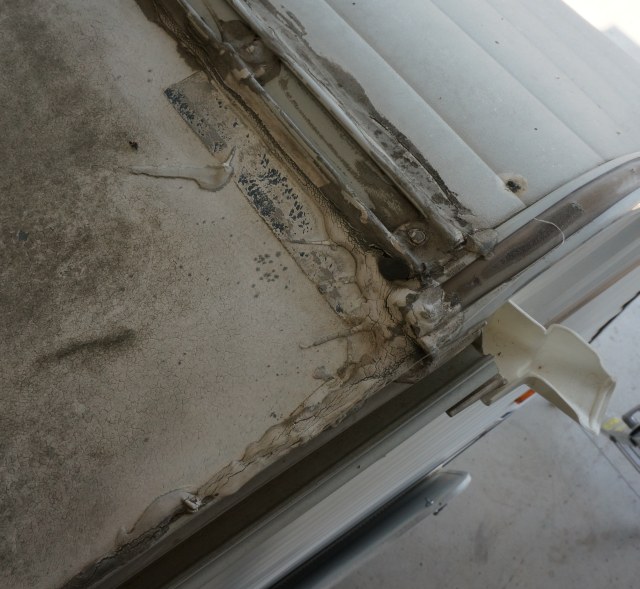
I started with the top roof to front siding seam as this seam needs to be lifted to inspect for damage and to get front siding off. Using the moisture meter on the roof I could see low levels of moisture (15 to 20%) in the corner scanning from the roof down. The inside of the camper showed 0% in all areas inside the ceiling and the top sidewalls under this area. The caulking was deteriorated and needed to replaced.
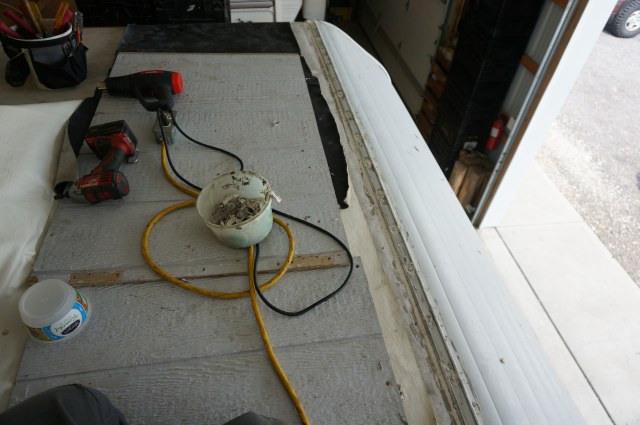
I start with placing tarps on the front area of the roof and 2’ x 4 ‘ plywood sheets so I can access the entire front seam.
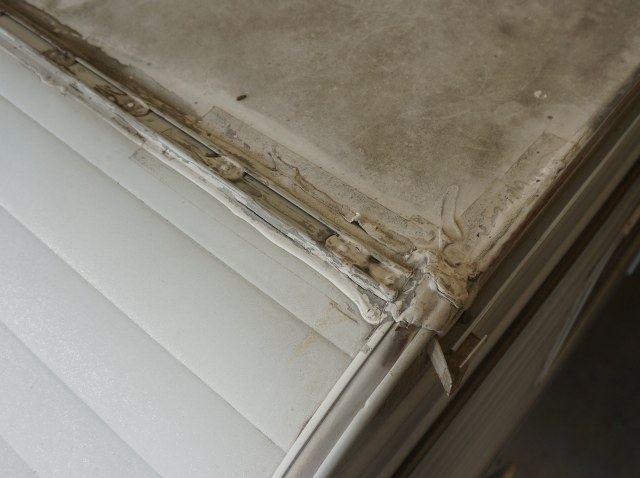
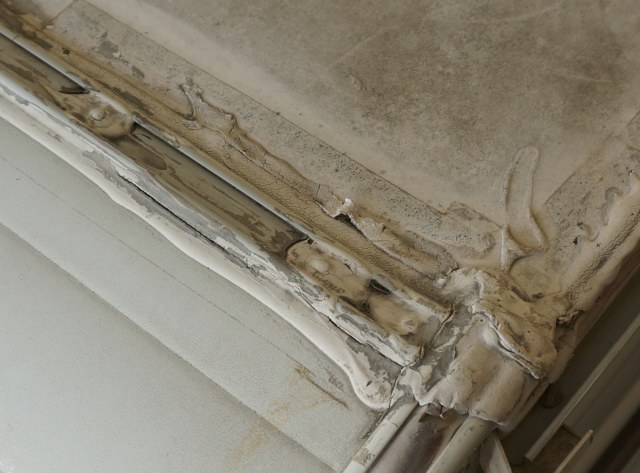
Next is the inspection of the left and right corners. This is what degraded caulking looks like. The sun UV rays really raises havoc on the caulk as the years go by. While some caulk was touched up along the way, it was not effective or enough. When the caulk gets to this stage it needs to be peeled up and new put down. This is past the touch up stage.
Top right side showing the degraded caulking.
![]()
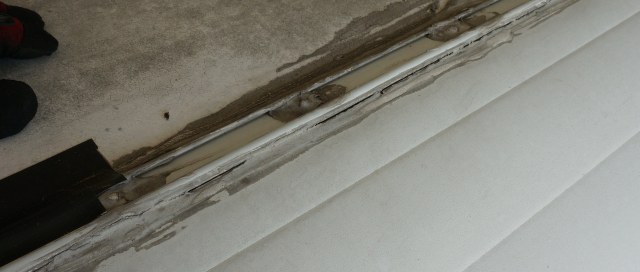
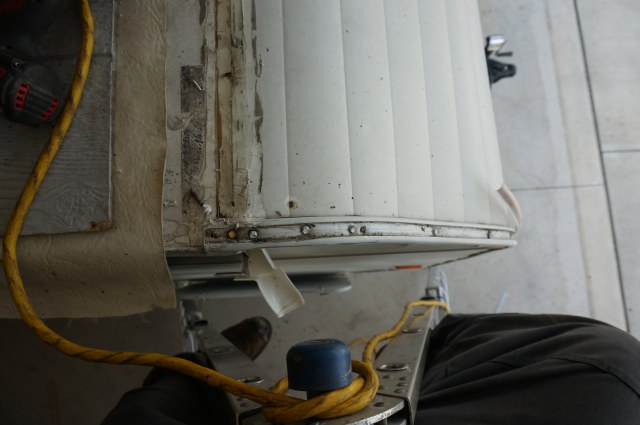
The front seam molding with shrunk caulking that created gaps to the molding.
![]()
A close up. As the years go by and the caulk shrinks and can separate from the molding as it did in this case creating a gap to the butyl sealing tape and the screws .
![]()
The top left side.
![]()
![]()
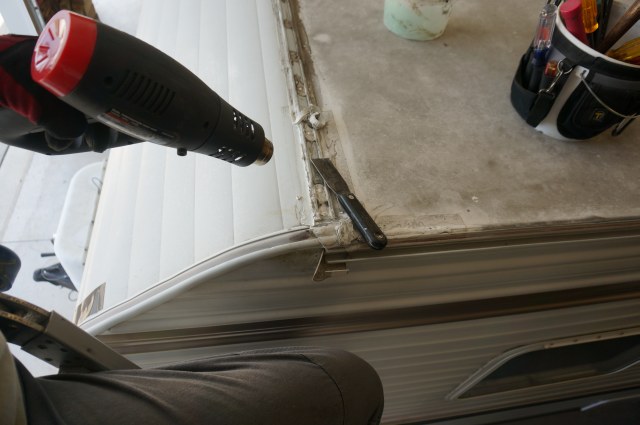
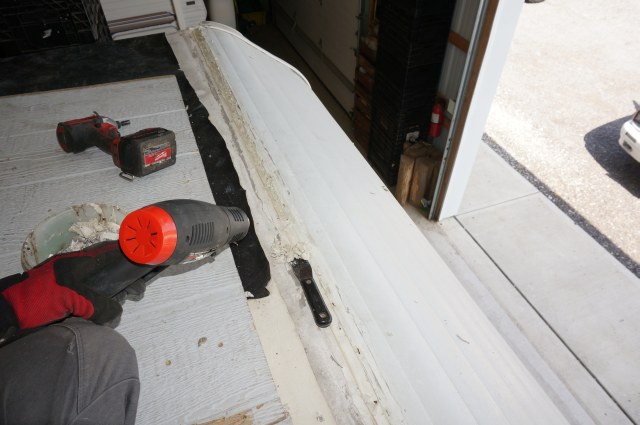
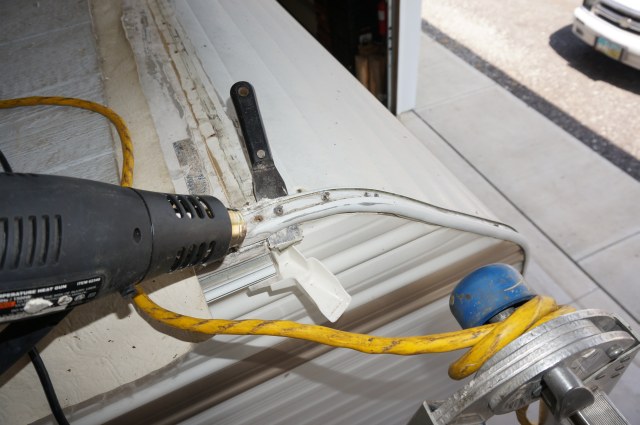
To remove the caulk, you use gentle heat and a very dull metal scraper. You have to dull over ever edge on the scraper blade to not dig into the roof. Heat come from a heat guns. Keep the gun moving not to stay in one spot long. You will get the feel of how much heat you need by how easy the scraper pushes. Point the heat gun in the direction you are peeling up to keep the heat ahead of you.
![]()
![]()
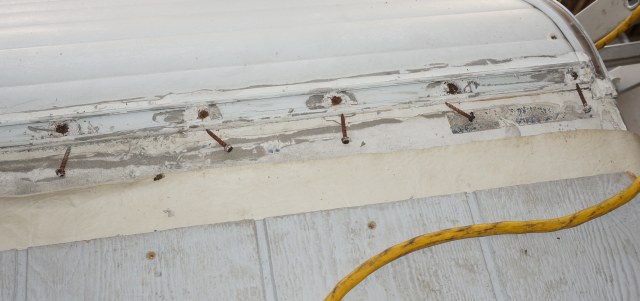
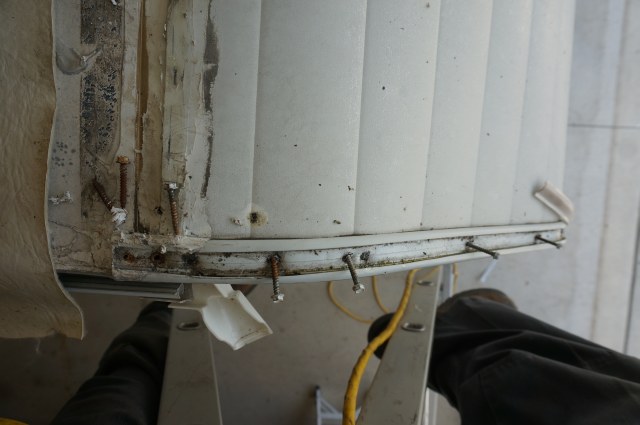
Here are rusted screw heads under the caulk. The cracks in the caulking allowed enough moisture to get in to rust the screw heads. This is the start of leak. The good news the front top corners just started getting moisture. I would estimate about 1 to 1.5 years ago.
![]()
Take notice of the rust on the screws. I put them next to the holes they came out of. Rusted screws are “one” of the ways a water infection starts. As the screws rust they can lose some of their holding power. Then the joint starts getting loose and soon water can work its way in.
Front left
![]()
![]()
Front right
![]()
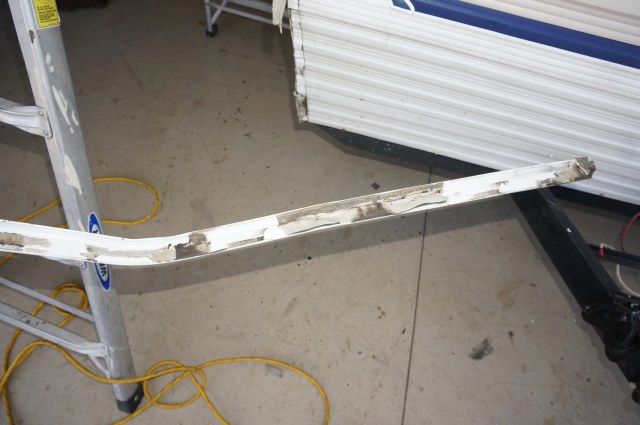
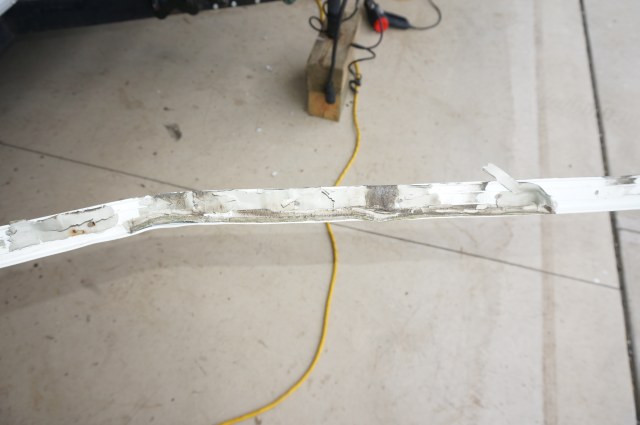
The molding flipped over to show the rust stains which are at the sealing point of keeping water out.
![]()
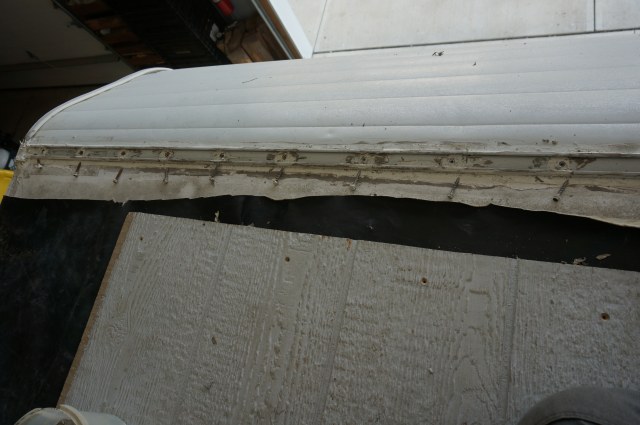
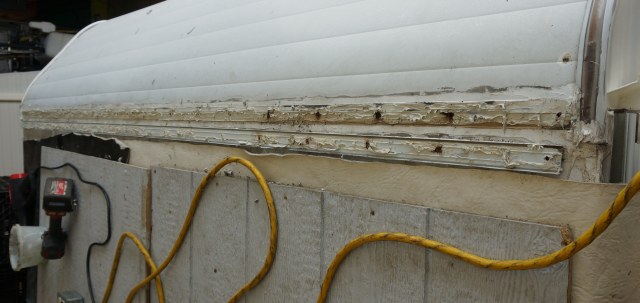
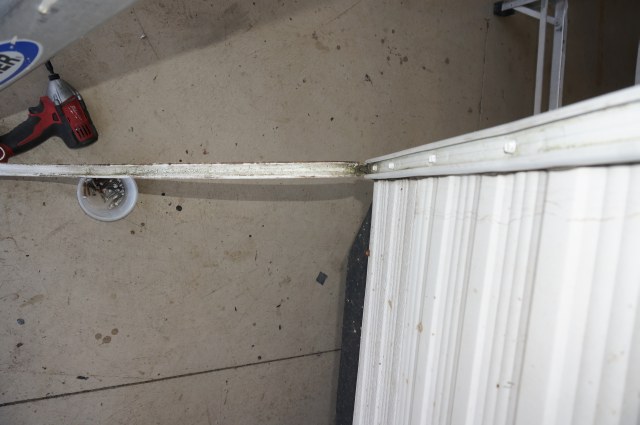
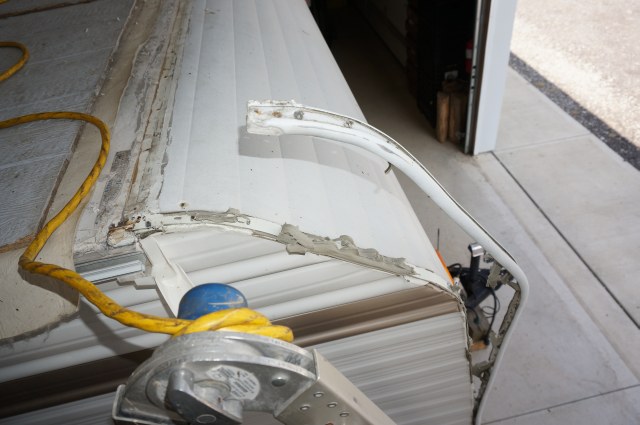
Once the front seam molding is up, you need to remove the butyl tape. Same process with heat and the scraper. Try and not use a lot of heat as excess heat will lift the glue between the rubber and the bud board liner under the rubber.
![]()
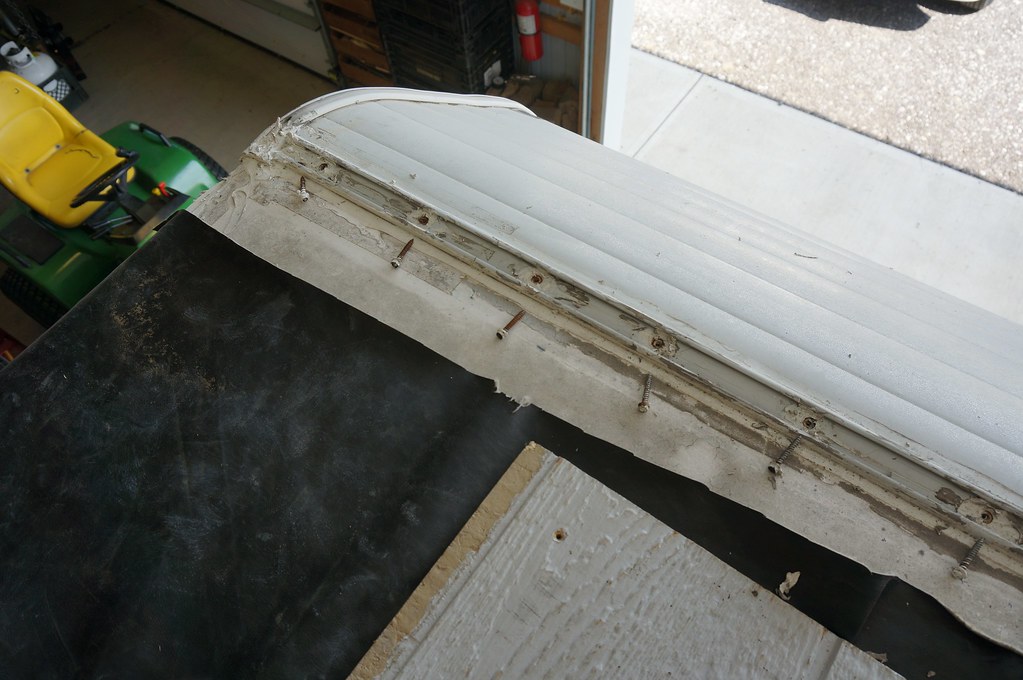
Next is to take up the corner molding. I start at the top and work down the molding. There is a vinyl screw cover that needs to come off. A screw at the top holds it from sliding down. See the rust on the screw.
![]()
More rusted screws under the cover
![]()
![]()
Another issue with the vinyl screw cover, it traps water, mold and crud behind it. Here it collects in the bottom, over time the screws start rusting. The cover needs a drain hole at the bottom
![]()
Once the screws are out, then warm the corner molding and gently lift it off
![]()
![]()
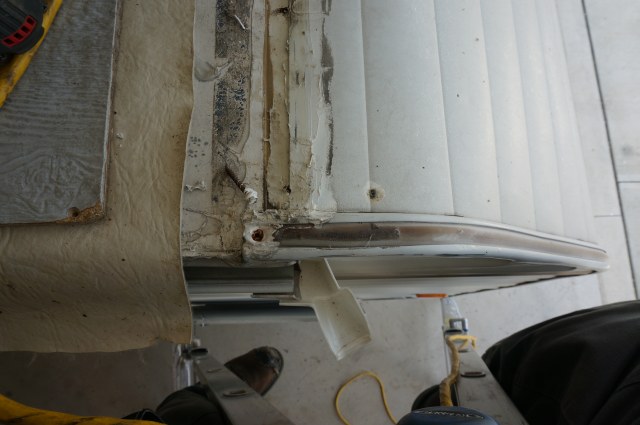
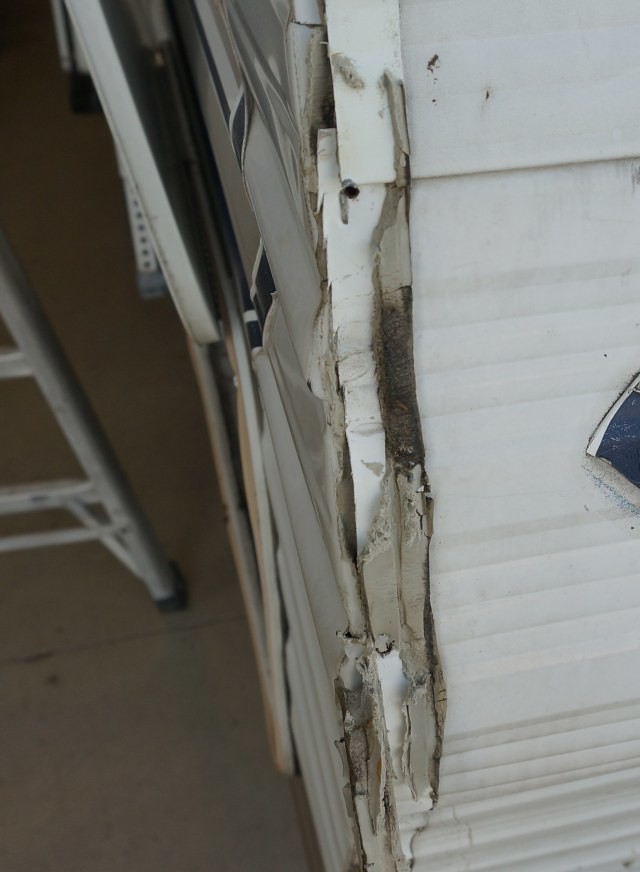
Here is the corner molding leak. The putty tape shrinks over time and separates from the molding or the siding. As the putty tape shrinks it cracks too. This is then a leak path. See the dirt on the siding or the putty tape. That dirt came with the water working its way into the corner. When the dirt line is all the way to the inside exists, a leak gets in. These leaks are old. Could be 8 plus years old.
![]()
![]()
![]()
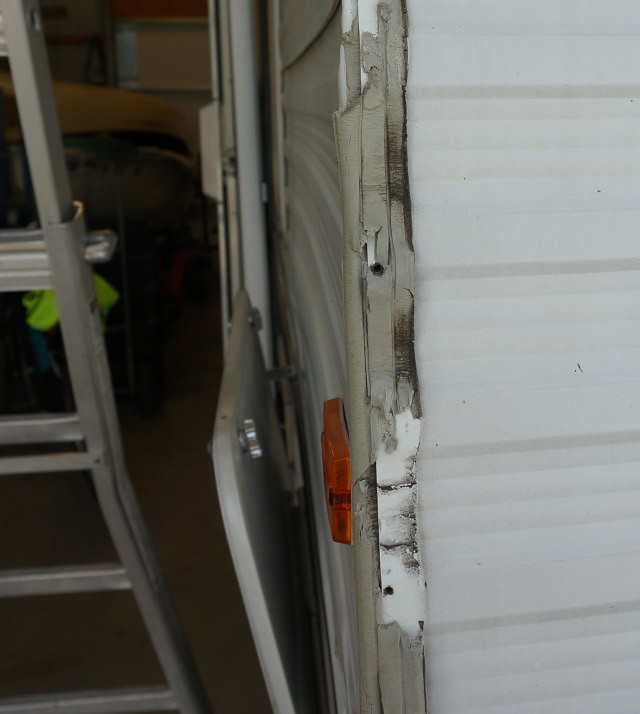
See at the yellow clearance light area a full blown corner leak.
![]()
And another area
![]()
More in the next reply.
The back wall, roof and all the other larger repair work will come as a winter project. I will add detail to this to help others learn and what to look for in their own camper. This is a fun project camper for me and I am glad I found it. The inside is in good shape from prior owners taking care of it. Just they may not have known about some of the causes of water damage and how to prevent it.
I will do this mainly in pictures to help cut down on the typing. The front wall area has 5 areas of water intrusion.
- The top left roof corner seam – Minor damage
- The left corner molding – Medium damage
- The top right roof corner seam – Minor damage
- The right corner molding – Large damage
- The front window – Large damage
I will try to group the pictures to follow the areas of damage where it fits. I knew when I bought the camper the front wall was wet and that was not a problem for me. Since I knew I had to take the siding off, all the rest of the areas came along for the ride. At this point I have all the rotted wood out and ready to start repair process.
Here is the front wall area of the camper before disassembly.
I started with the top roof to front siding seam as this seam needs to be lifted to inspect for damage and to get front siding off. Using the moisture meter on the roof I could see low levels of moisture (15 to 20%) in the corner scanning from the roof down. The inside of the camper showed 0% in all areas inside the ceiling and the top sidewalls under this area. The caulking was deteriorated and needed to replaced.
I start with placing tarps on the front area of the roof and 2’ x 4 ‘ plywood sheets so I can access the entire front seam.
Next is the inspection of the left and right corners. This is what degraded caulking looks like. The sun UV rays really raises havoc on the caulk as the years go by. While some caulk was touched up along the way, it was not effective or enough. When the caulk gets to this stage it needs to be peeled up and new put down. This is past the touch up stage.
Top right side showing the degraded caulking.
The front seam molding with shrunk caulking that created gaps to the molding.
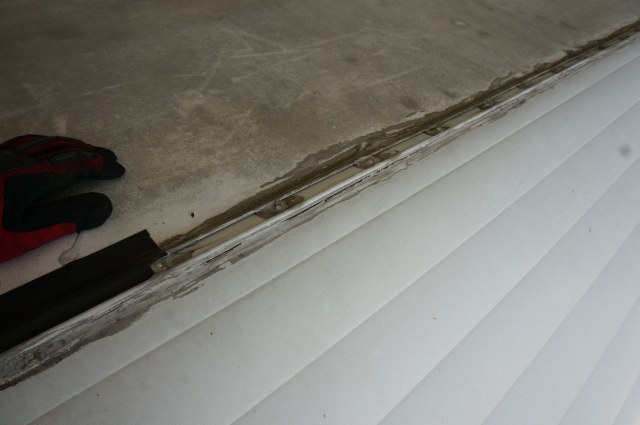
A close up. As the years go by and the caulk shrinks and can separate from the molding as it did in this case creating a gap to the butyl sealing tape and the screws .
The top left side.
To remove the caulk, you use gentle heat and a very dull metal scraper. You have to dull over ever edge on the scraper blade to not dig into the roof. Heat come from a heat guns. Keep the gun moving not to stay in one spot long. You will get the feel of how much heat you need by how easy the scraper pushes. Point the heat gun in the direction you are peeling up to keep the heat ahead of you.
Here are rusted screw heads under the caulk. The cracks in the caulking allowed enough moisture to get in to rust the screw heads. This is the start of leak. The good news the front top corners just started getting moisture. I would estimate about 1 to 1.5 years ago.
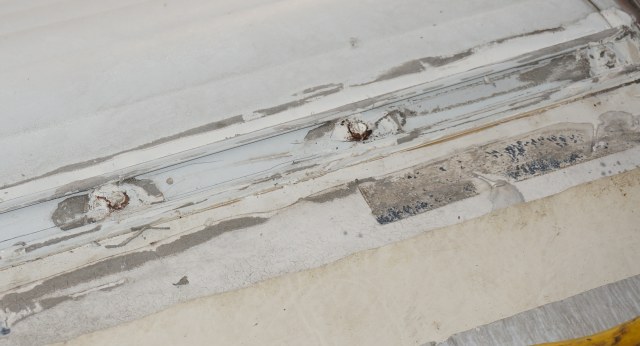
Take notice of the rust on the screws. I put them next to the holes they came out of. Rusted screws are “one” of the ways a water infection starts. As the screws rust they can lose some of their holding power. Then the joint starts getting loose and soon water can work its way in.
Front left
Front right
The molding flipped over to show the rust stains which are at the sealing point of keeping water out.
Once the front seam molding is up, you need to remove the butyl tape. Same process with heat and the scraper. Try and not use a lot of heat as excess heat will lift the glue between the rubber and the bud board liner under the rubber.
Next is to take up the corner molding. I start at the top and work down the molding. There is a vinyl screw cover that needs to come off. A screw at the top holds it from sliding down. See the rust on the screw.
More rusted screws under the cover
Another issue with the vinyl screw cover, it traps water, mold and crud behind it. Here it collects in the bottom, over time the screws start rusting. The cover needs a drain hole at the bottom
Once the screws are out, then warm the corner molding and gently lift it off
Here is the corner molding leak. The putty tape shrinks over time and separates from the molding or the siding. As the putty tape shrinks it cracks too. This is then a leak path. See the dirt on the siding or the putty tape. That dirt came with the water working its way into the corner. When the dirt line is all the way to the inside exists, a leak gets in. These leaks are old. Could be 8 plus years old.

See at the yellow clearance light area a full blown corner leak.
And another area
More in the next reply.